


![]()
|
|
|
|
Horizontal lines can be added by selecting Horizontal Line from the Insert menu. You can edit the properties of the line by double clicking on it. LINKSYou can create links by selecting the desired text and selecting the Link tool on the tool bar. Then enter the URL of the location that you want to link to. Here is a link back to the Homework Hints page. You can edit existing links in Netscape Composer by right clicking on them and selecting Link Properties. You can create links to send mail. This is done in the same way as adding other links, except you will need to enter mailto: and then the email address instead of a URL. Here is an example of a link to Dr. Nelson's email: mailto:jimn@byu.edu. You can create links to different parts of the same page. First you need to insert a target at the location of the page that you want to jump to. This can be done by selecting the Target tool in the tool bar while your cursor is in the desired location. A box will come up in which you can enter the name of the target. Then you can link to this part of the page in the same manner as other links, except you will just need to select the name of the target in the dialog box instead of entering the URL. The following links are to different headings within this page. LISTS LISTSThere are several different ways of making lists:
INDENTING
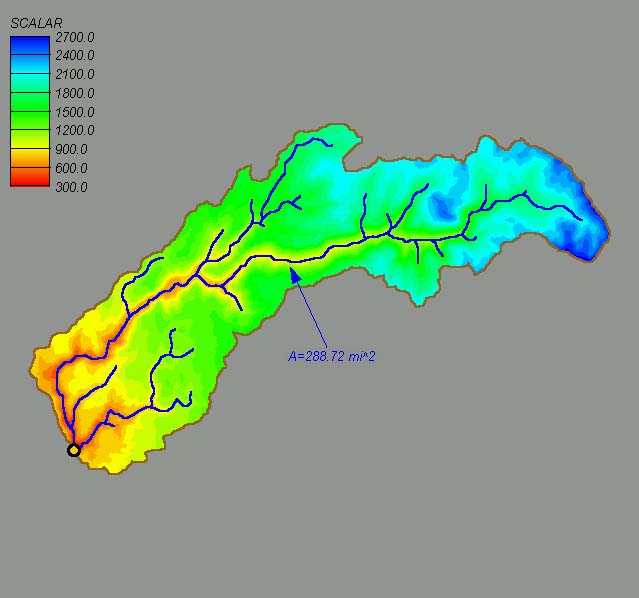
You can decrease the indenting on your paragraph by selecting the Decrease Indent tool on the tool bar or by hitting CTRL -. This will decrease the indenting on your entire paragraph. Hitting the TAB key is equivalent to hitting the spacebar 4 times. It will not indent the entire paragraph but will only insert 4 spaces from the location of the cursor when the TAB key was selected. INSERTING IMAGESTo insert an image in Netscape Composer, select the Image tool on the tool bar with your cursor in the desired location, then specify the name of the image. It is easiest to have the image in the same location as your html document. This way, you only need to enter the name of the image in the insert image dialog instead of the entire path. You can edit the image properties by right clicking on the image and selecting Image Properties. The following image shows a watershed and its elevations as delineated by WMS.
Images can also be links to other documents. This is done by right clicking on the image and selecting Create Link Using Selected... or by selecting the image and then selecting the Link tool on the tool bar. SAVING and PERMISSIONSYou need to be careful when you are saving your web pages. If your page has the wrong permissions, others will not be able to view your page. If you are using the PC's to create your web pages, make sure that you save your document to the W drive. This will set the permissions so that everyone can view it. It is also possible to save to the J drive in the www directory, however if you do it this way, only you will be able to view it. The same thing also applies to images that you use in your web pages. They must be saved to the W drive for others to be able to view them. If necessary, you can change the permissions of your files by using the chmod command. Following is a procedure for using this command. To Change Permissions:
|